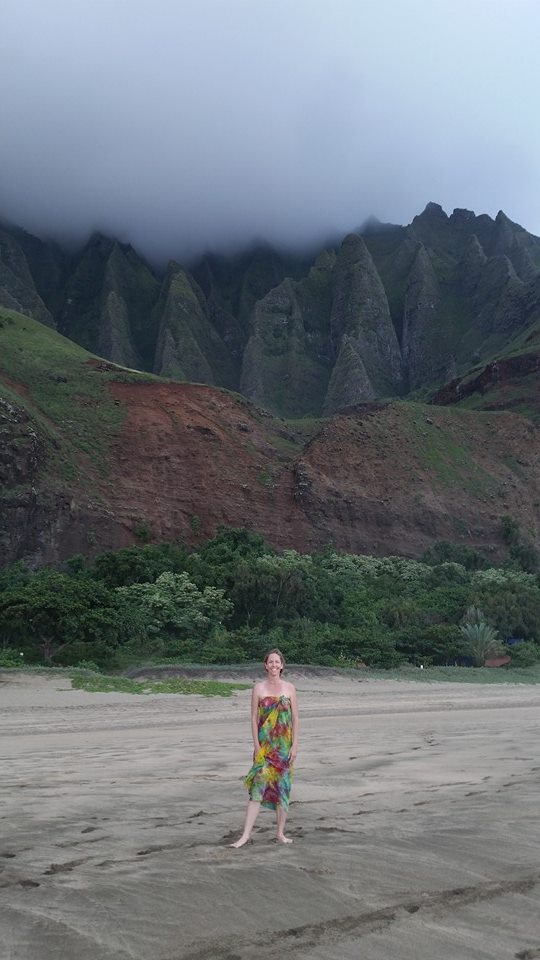
Cool cloudcover our second night
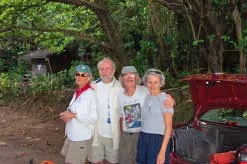
We just completed our 3rd trek on the Kalalau and wanted to share the experience again for those that may be interested.
Motivation:
If you’ve not done the Kalalau Trail it should certainly be on your list; especially if you’re a fan of the outdoors and enjoy the awesome beauty of nature. If you’ve done the trail then you know just how magical it can be and how it can recharge the souls of us poor bastards who are cooped up in work environments most of the time. As I said earlier, this is the 3rd time we’ve done the trail and it started 4 years ago as a personal challenge to get in better shape. I’m now 46 years old and hiked the 8 miles to Hanakapi’ai Falls and back in April of 2010 with my entire family. I’m 6’ tall and weighed close to 280lbs at the time and was completely embarrassed how fat and out of shape I had become. I made a promise to myself that I would return a healthier person and came back in November of 2010 to hike the whole thing; albeit 40lbs lighter. I still had no business making the trek at 240lbs but was determined to do it and I did. My wife and 12 year old daughter joined me and we stayed two nights at Kalalau Beach and returned on day 3. My wife and I returned in 2012 and made the trek again; this time for 4 nights. Our most recent trip was in November of 2014 and we bought permits for 5 nights this time. On a side note, I’ve continued to live a healthier life over the past 4 years and made the hike this time at 215lbs.
Physical Preparation:
Even though I’ve lost 60lbs over the past 4 years, I’m still too fat for my height. I’m now 215lbs and carry that on a 6’ frame. I’m committed to hiking the trail in 2016 at 195lbs and I can’t wait to write a post about that. Now, as it relates to this particular trip, we had a small hiccup 5 months prior to the hike. I unfortunately tore my MCL in June after booking the trip earlier in April. I was so bummed about missing the hike that I decided to try and find a way to do it without an MCL. Against my surgeon’s advice, we decided to do the hike anyway. I purchased a carbon fiber brace that is similar to the ones used by offensive linemen in the NFL. It allowed a full backwards “hinge” or bending of my knee but allowed no “pivoting” or side to side movement at all. We began hiking about 6 weeks prior to our trip and started with 2 mile hikes most of the time. The benefit for us is that we live at almost 9,000 feet and have a natural lung capacity that is a bit better than most who hike the trail. We gradually increased those hikes to 5 to 6 miles and began doing some steep inclines of about 900 ft. in one mile. I got comfortable enough with the brace and how my knee was responding that we decided to go ahead with the Kalalau trip. I would say that I was in “average plus” shape when we did the hike but I was not “fit” by any stretch.
Planning:
I purchased the permits 9 months prior to our trip. I got them online using this link https://camping.ehawaii.gov/camping/welcome.html and found the process is fairly easy. Since this is the third time we’ve done the trail we know that you want a minimum of 3 days at Kalalau when you book your trip. If you plan on going out and back in just two days, you will regret not spending more time. The permits do sell out fairly quickly so I recommend making that investment just as soon as you can.
Gear for the hike:
We’ve gotten much better with each trip but plan on traveling as light as you can. Below are some weight-saving ideas that served us well this past trip. Again, we were there for 5 nights so we packed accordingly but much of these will be the same regardless of the days spent.
[blockquote style=”3″]It never gets below 65 degrees at Kalalau and hovers near 70 most nights.[/blockquote]
Packs: We both carried Osprey 60 liter packs and had plenty of space. They had 3 liter hydration systems and that was sufficient.
Tent: We use a Mountain Hardwear 2-person tent that weighs approximately 4lbs. You will not need a foot print as you will find plenty of clear spots to set up. Many folks simply take hammocks and use a rainfly and that will work as well but we like the space in the tent and frankly there are things you can do in a tent that you can’t do in a hammock.
Sleeping Gear: It never gets below 65 degrees at Kalalau and hovers near 70 most nights. We simply purchased silk sleeping bag liners that are very compact and weigh less than a pound each and did not take sleeping bags at all. We both took sleeping pads and found that the thermarest ultralights are very light and serve their purpose well. You will not need anything warm to sleep in at all so do not worry about long sleeve pants or shirts for night time.
Clothing: We each took two shirts and two pair of shorts on the trip; plus swimming suits. One pair for hiking in and out and another pair for wearing while at Kalalau. Exofficio makes a great line of undergarments that wash and dry very well and I would recommend those instead of multiple pairs of undies. A hat and a rain jacket are also recommended as both could be needed at some point. Clothing is somewhat optional while at Kalalau and you will most certainly see folks walking around with nothing on; especially near the beach and on the trail. We are not overly comfortable doing that but did disrobe to swim and bathe.
Footwear: This is a hot topic amongst some and you should just go with what you feel is best. We DO NOT wear hiking boots although some swear by them. We have both switched to the ultra-light running shoes that weigh next to nothing and dry quickly. I don’t like the weight of hiking boots and your feet are going to get wet regardless of what you wear so I prefer to not carry the weight. We each took 4 pairs of thick running socks and ensured we had dry feet whenever possible.
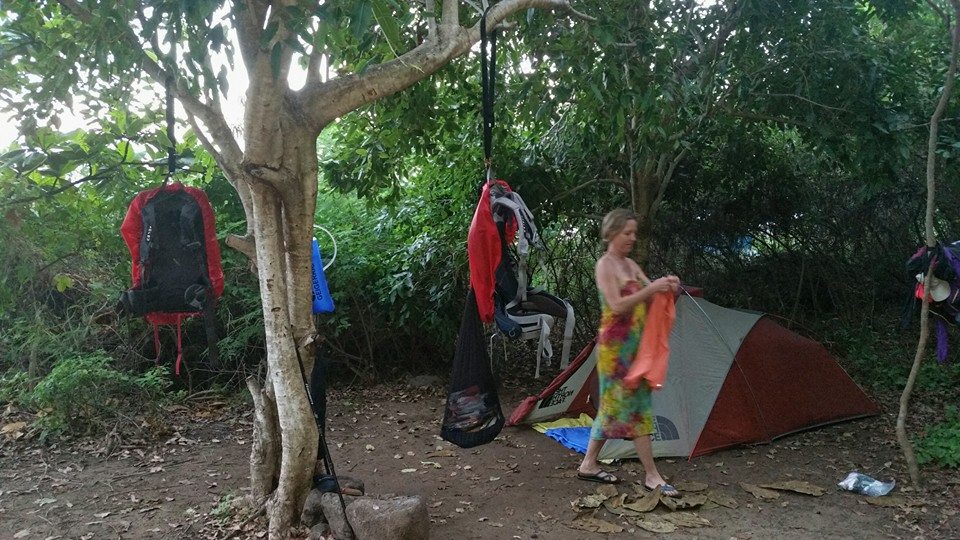
Our campsite for 5 nights
Food: We have converted completely to dehydrated food for our trips. They weigh very little and can now be purchased at many places either in person or online. There are many different brands and dishes and we focused on which had the most carbs and protein. We ate three meals per day and purchased food packs that had 2 servings each. We also purchased powdered flavored coffee drinks that were great to have in the mornings to get things going. One thing that we’ve learned is that taking condiment packs is a great way to ensure a better flavor in the food. We brought packets of ketchup, hot sauce, salt, pepper and red pepper flakes used for pizza. We also really counted on energy snacks on the way out and back. Again, there are several options from power bars, to gel shots to Gatorade chews and I recommend trying to do 4 of those each way on the trail.
Camp Gear: We took an MSR water filtration system but never used it. The water from the water fall is safe to drink as is the water at Hanakoa at mile maker 6. We used a jet boil brand stove for cooking and took one small canister of fuel (that is plenty). I recommend a Leatherman or survival knife, some sort of fire starter, basic eating utensils and drinking cups. We also bring about 50ft of twine to use for clothes lines, etc. Good headlamps are a must as are extra batteries as a backup. I also recommend a well thought out first aid kit with focus on bug repellant, Band-Aids and Neosporin. We also get scripts from our docs before we go with antibiotics and pain killers just in case something happens.
Electronics: I know that Kalalau is a way to escape electronics but we cheat a bit here. We both took our cell phones so that we had use of the cameras and I brought an iPad mini with a few preloaded movies to watch at night in the tent. I purchased a Mophie battery pack and it kept everything charged for the entire 5 days. I kept all of these in Ziploc bags to keep them dry and clean.
The Hike To Kalalau:
I recommend resting up the day before and eating a carb loaded dinner the night before and morning of the hike. I messed up on this trip as I hiked the 8 mile trip to Hanakapi’ai Falls with my sister and her husband the day before and I certainly felt it on the way to out to the beach.
[blockquote style=”3″]If you haven’t done the trail before, the first half mile of the trail is fairly steep and you gain quite a bit of elevation rather quickly.[/blockquote]
We ate a very full breakfast and got dropped off at the trail head about 6:00 am. If you don’t have a ride then you can use the North Shore Taxi for about $40 and he will take you as early as you want to go. I don’t recommend leaving your car out there for 5 days as they get broken into sometimes. If you do end up taking your car, I would recommend removing all valuables and leaving the car unlocked. The worst you will lose is your floor mats.
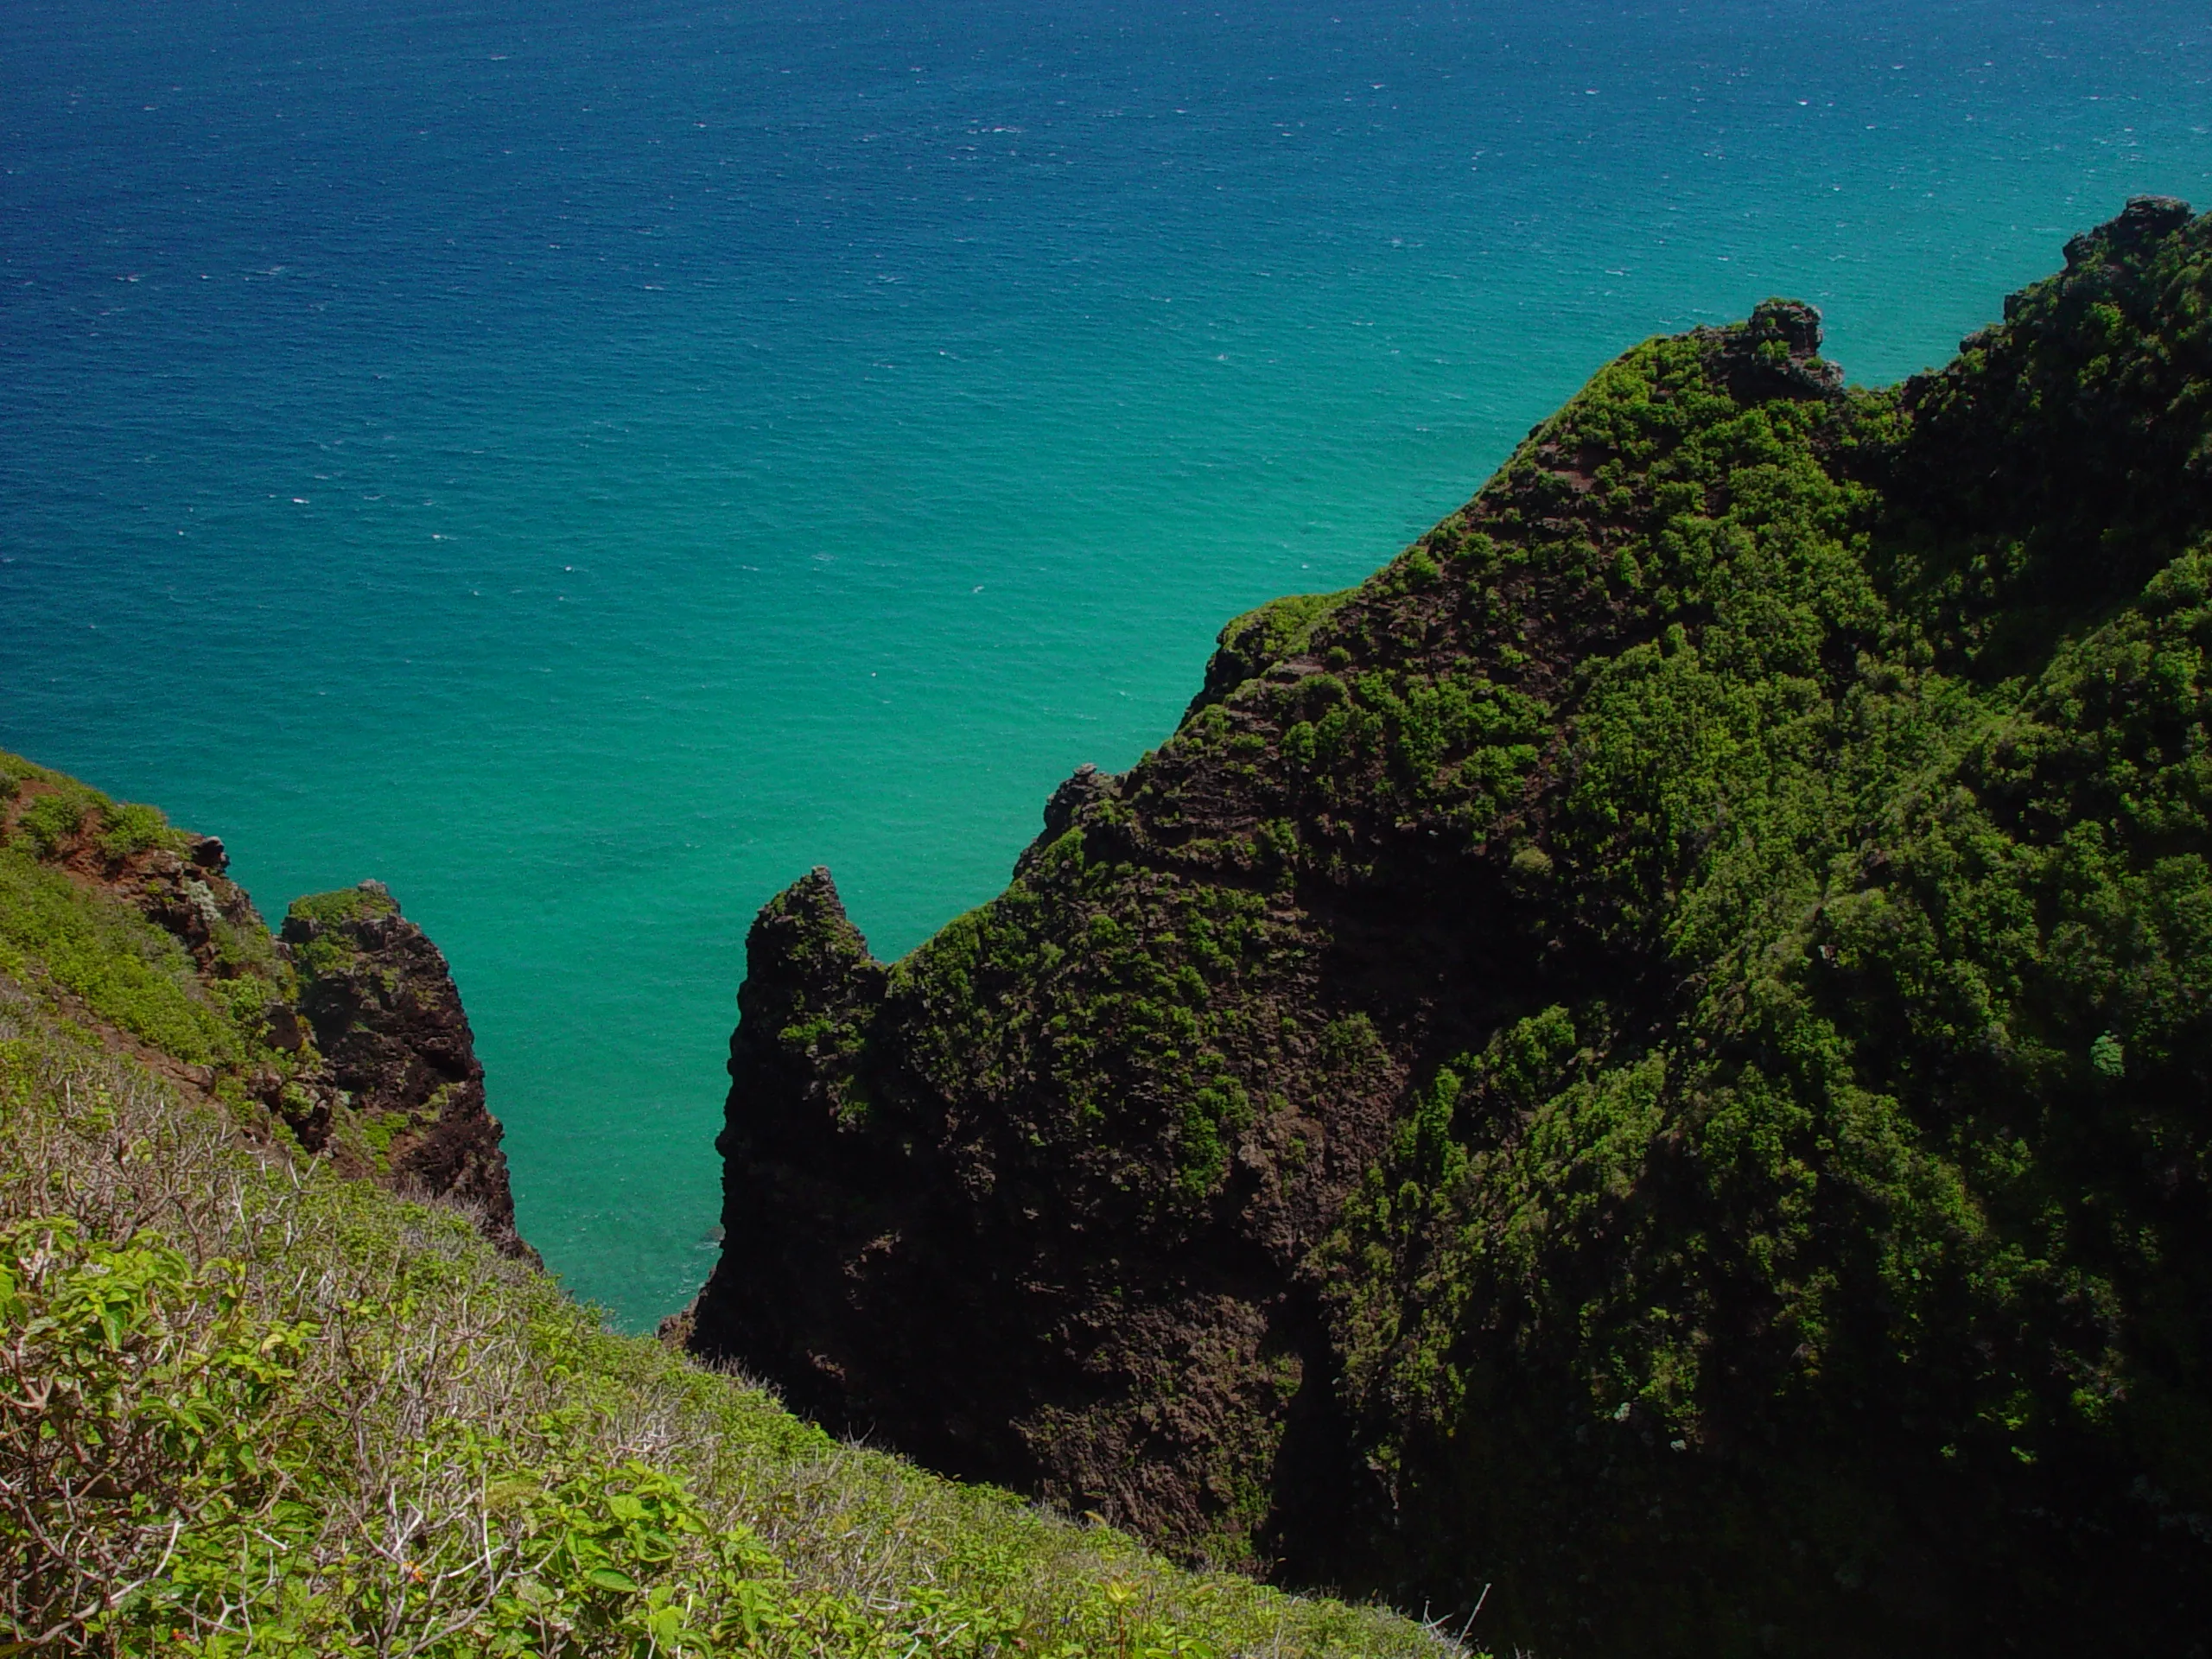
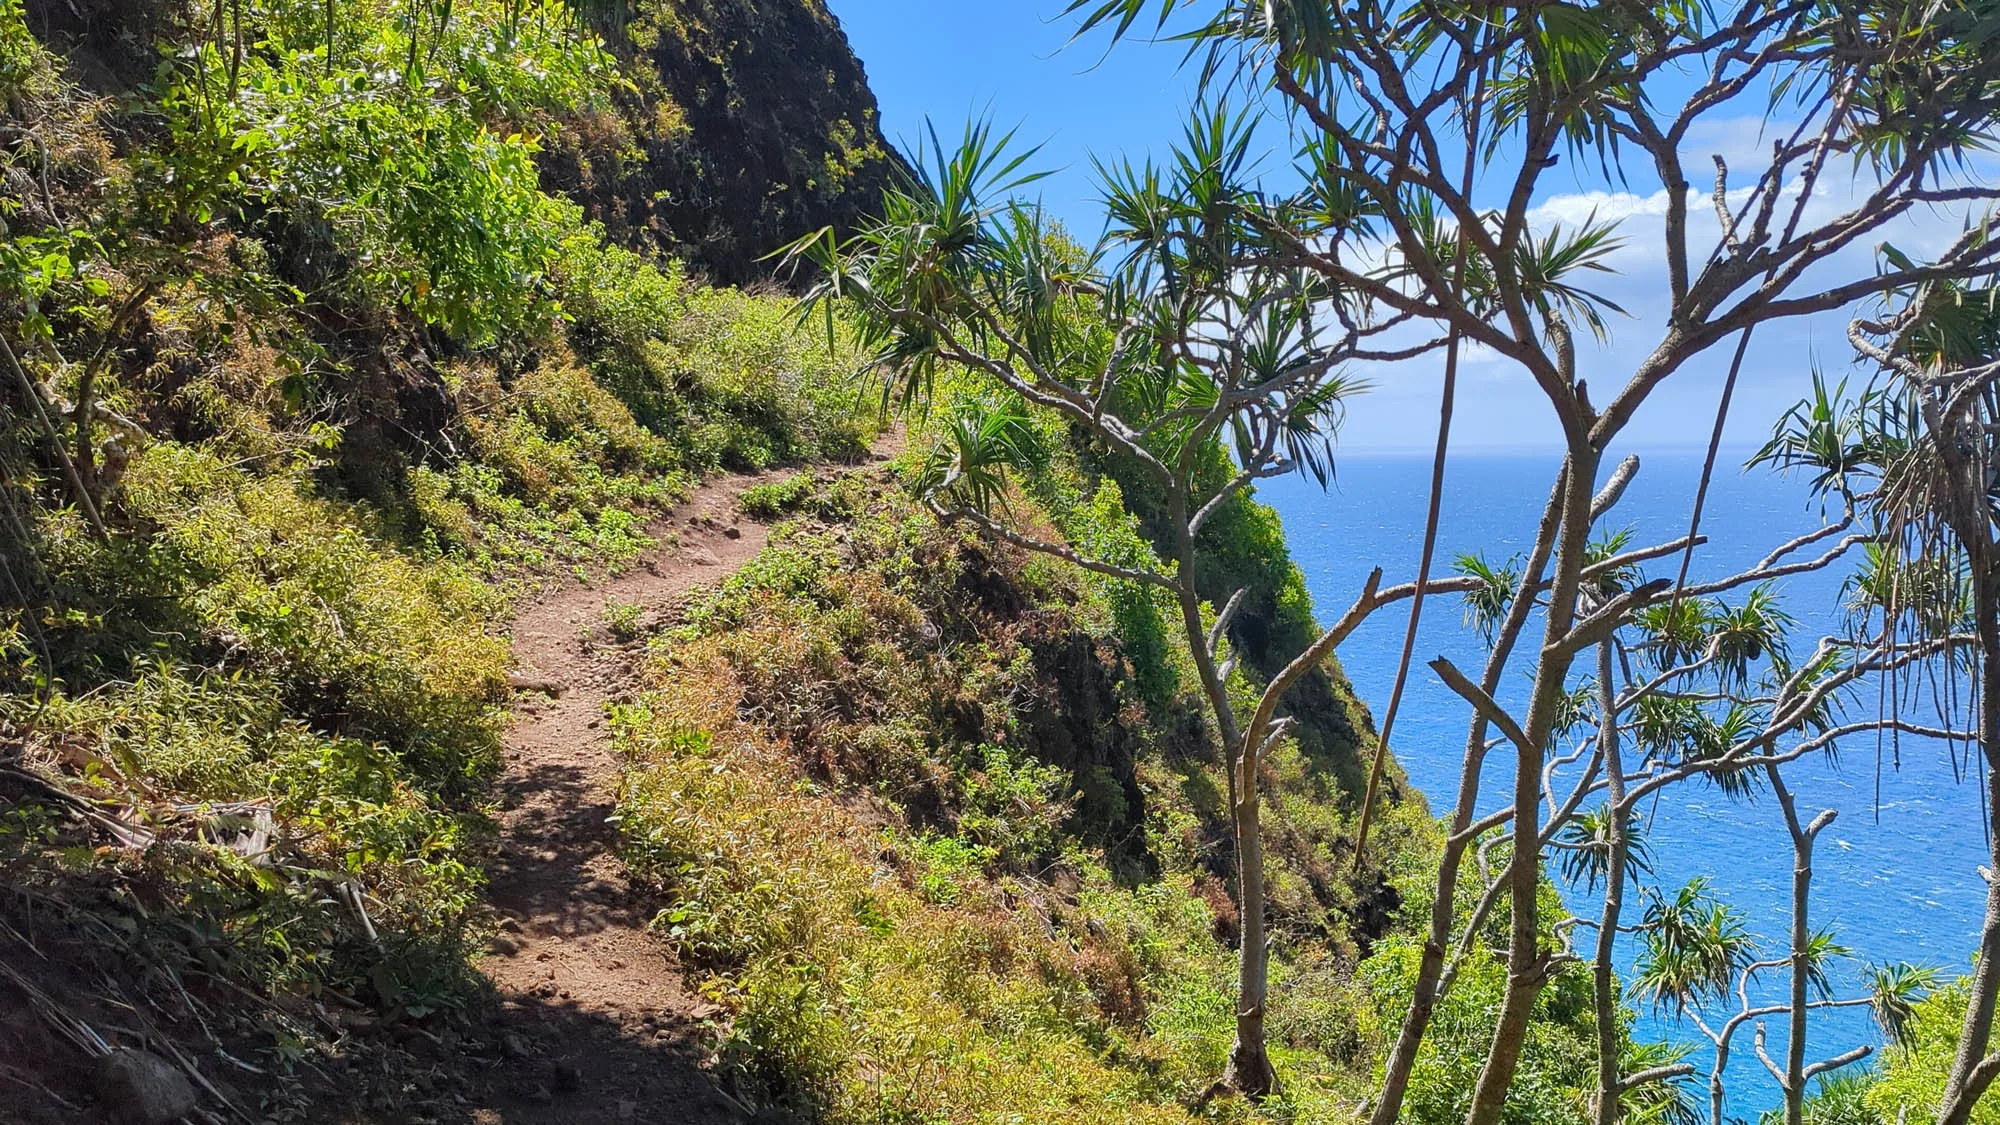
If you haven’t done the trail before, the first half mile of the trail is fairly steep and you gain quite a bit of elevation rather quickly. Hiking poles are an absolute must in our book as they provide some safety in the mud and allow you to use all 4 limbs to do your climb. Don’t worry as it flattens out after the first mile and then is mostly downhill to Hanakapi’ai beach which is two miles in. From there you will cross your first stream and this is a decent spot for a quick rest if you want one. When you head out from there you will take the right fork in the trail as the left goes to the falls. The elevation gain between miles 2 and 3 is one of the largest on the hike. You will gain about 900ft in less than a mile and I certainly feel it when I’m on that section. Miles 3 thru 6 are of varying terrain and move from jungle to ridgelines rather frequently. It’s an extremely beautiful part of the trail and you will most likely run into your first pygmy goats. At mile marker 6 (ish), you will come to Hanakoa campground which is a stopover option if you don’t want to go all the way in one day. There is a composting toilet here as well as picnic benches and camping spots. The water in the Hanakoa stream is good to drink and you should fill up your water bottles here.
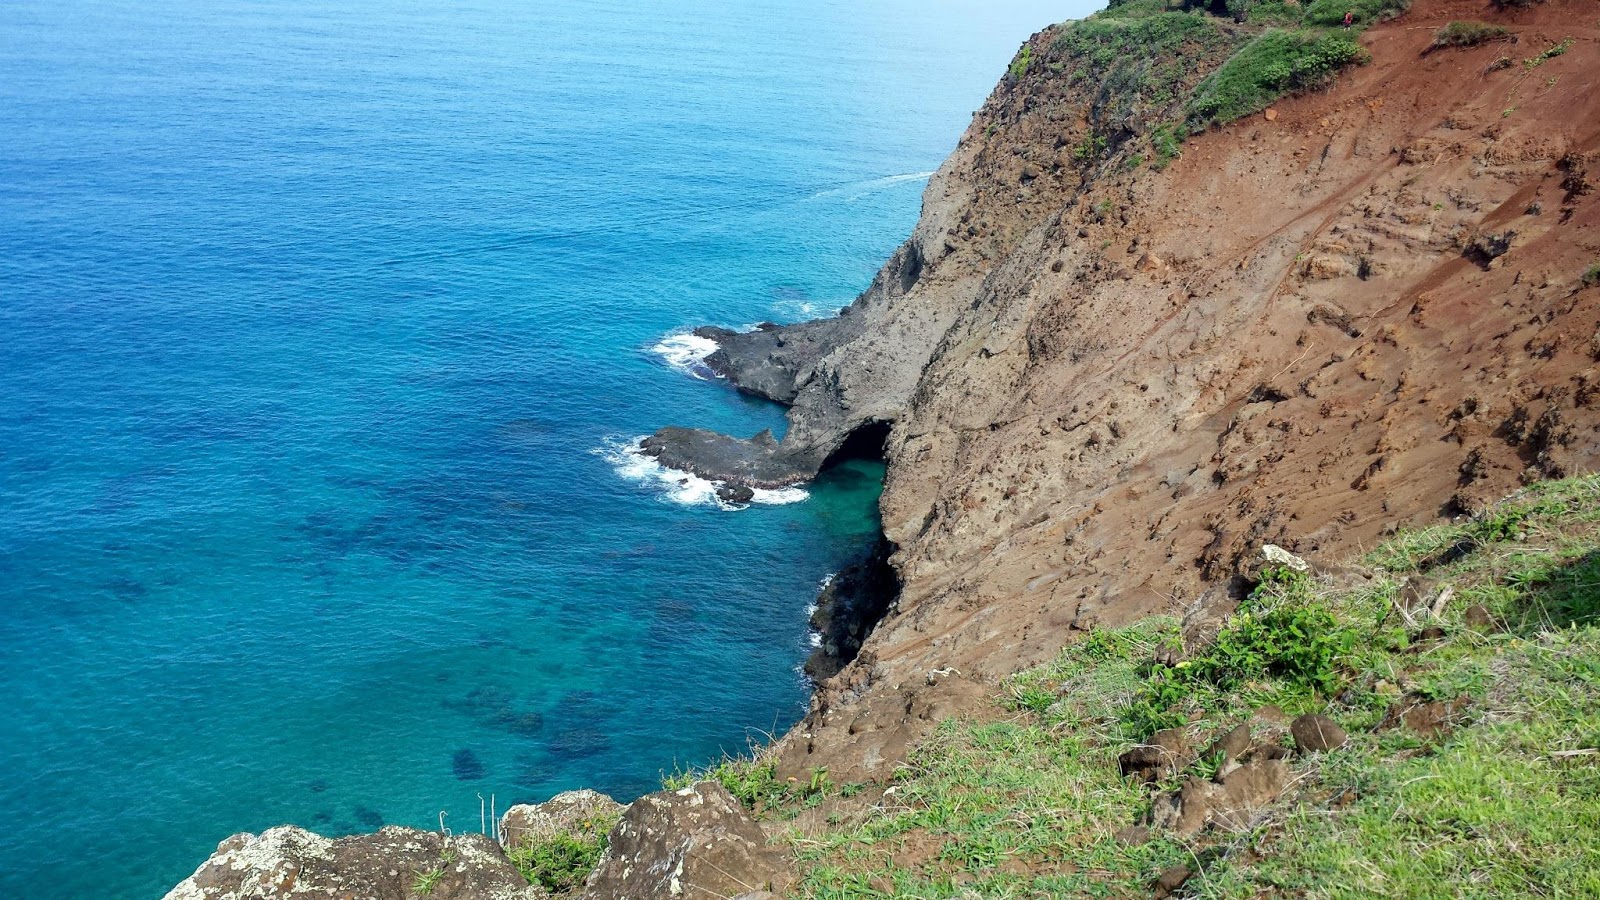
View from near mile marker 8
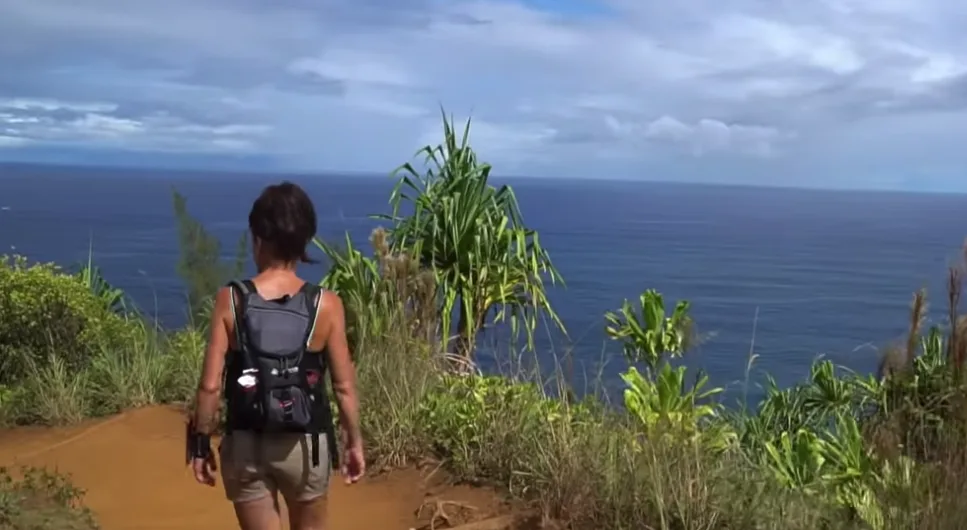
Leaving Hanakoa the trail gets a bit more difficult. We had always wondered what it would be like to hike the trail in the rain and we have now checked that off the bucket list. It was an absolute deluge and the hillside trails were slick and should be taken seriously. Just past mile marker 7 you will come to the famous “Crawler’s Ledge”. It’s been a bit overblown and is not any more difficult than the rest of the trail but if you have a fear of heights then make sure to keep your eyes looking ahead. It can be a bit dicey in the wind and rain but just stay focused and all will be fine. Miles 7 to 9 are my least favorite part of the trail as it contains the sections referred to as “Mars” and “Red Hill”. These red dirt sections are slick whether dry or wet and give me the most angst on the hike. Once you get thru the final section of Mars you will see a green meadow below and that’s the sign showing your almost there. At mile 10 you will come to the Kalalau River and I have dropped my pack and jumped in each time. I’ve been hot and tired and frankly it’s one of the best feelings I’ve had. From there, you simply cross the river, veer to the right and walk to the beach. The hike has taken us anywhere from 6 to 9 hours depending on conditions.
Where to Camp:
When you get close to the beach you will begin seeing signs for camping on the left. The camping area runs about half a mile and it’s pretty easy to find a spot. The nice things about these spots are that they are in the shade and provide some cover for the afternoon rains. The composting bathrooms are also in this area so your walk is not far if you need to use those. If you don’t want to camp in the trees then just keep going towards the beach and you will see spots in the shrubs on the right side nearer the beach. If you continue to walk past the beach you will see additional spots available but they are in a more open area and don’t provide much privacy. The positive to these spots is that they are close to the fresh waterfall which is the primary water source for everyone there. The water is clean and can be drunk without treatment.

One of the beautiful waterfalls in the valley
What To Do While There:
This isn’t really a trick question as there are some options other than just relaxing. There is a beautiful hike up into the valley that takes you to several cool spots. There are a myriad of trails once you get up there and half the fun is seeing where they lead. One led us to a group of naked men who invited us down for a drink. Another led us to a girl who just graduated from college and was spending a couple of months before entering the workforce. Our favorite trail leads thru something akin to a hobbit hole and eventually to one of the most beautiful waterfalls I’ve seen. Depending on the season, several fruits are plentiful in the valley. We’ve seen oranges, guava, mangos, papayas and bananas. The folks that live out there full time are normally eager to share with you and all seem friendly (mostly).
The Hike Out of Kalalau:
We have tried to hit the trail out by 7-8am. That gives us the opportunity to get a decent breakfast and get everything packed up. Please remember to pack out ALL of your trash as not everyone does that. It’s disappointing to see but it does happen.
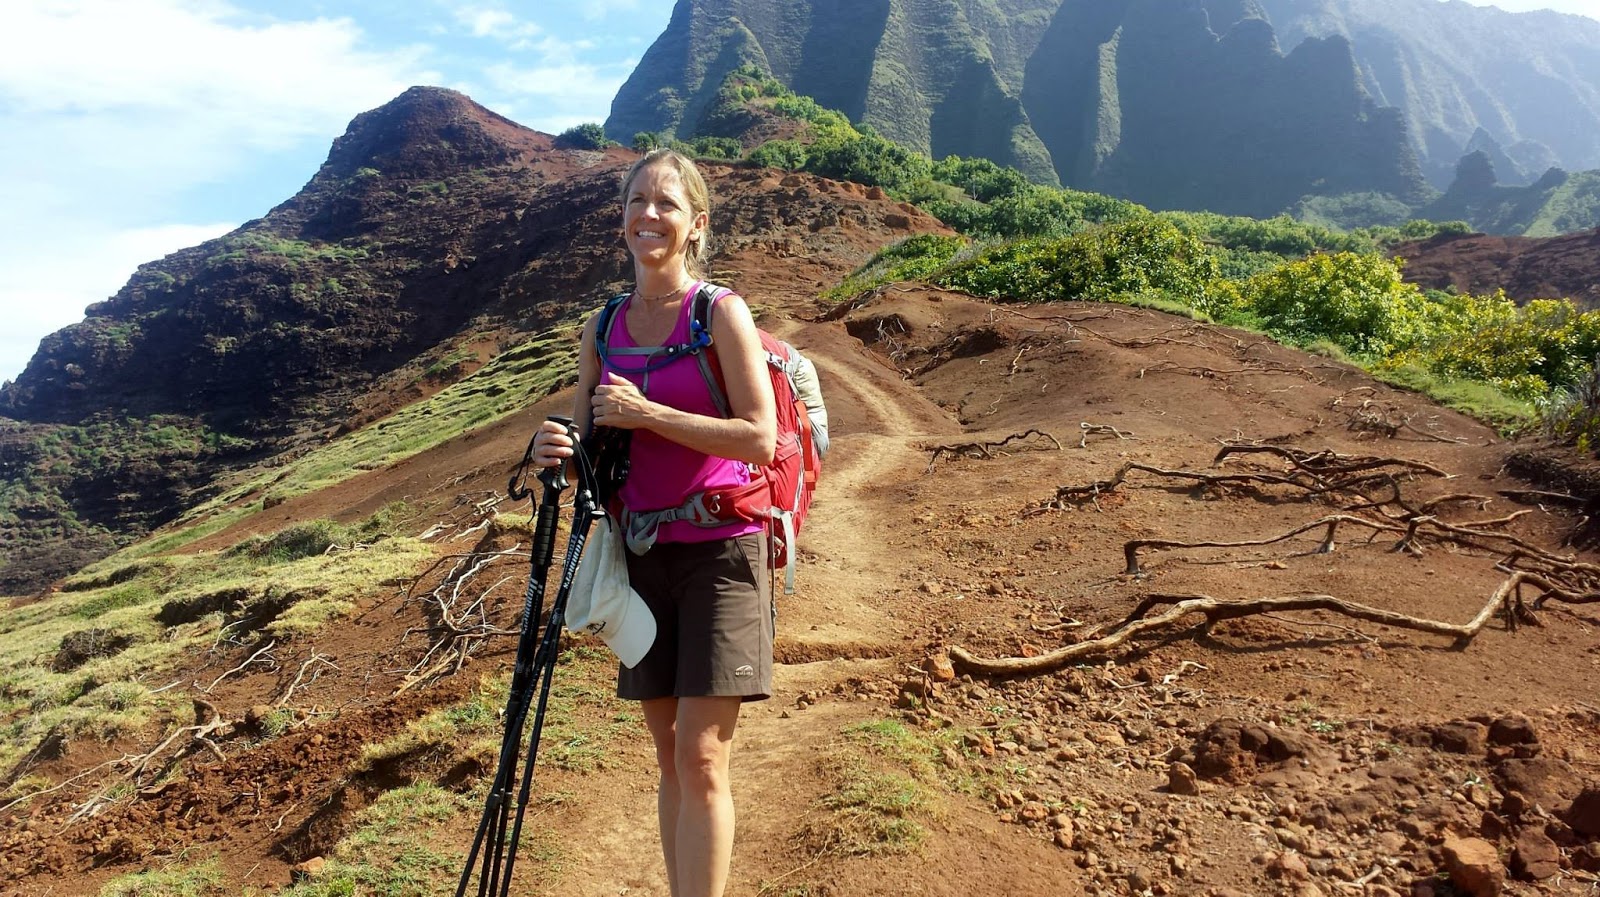
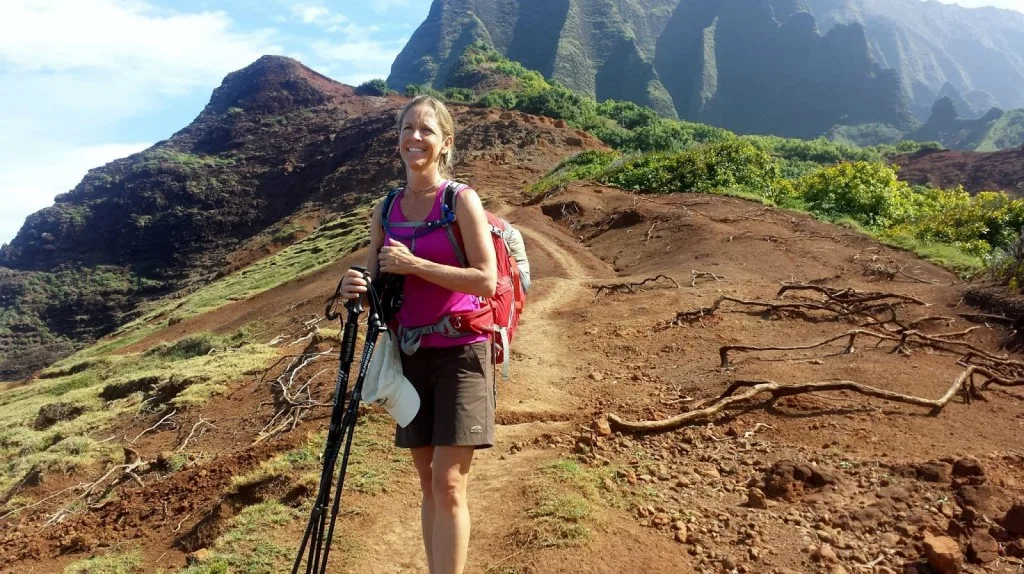
Mitzi going up the Mars section on our way out
The climb back out thru Mars and Red Hill are, without a doubt, my least favorite part of the entire trip. It’s steep, slick and long. The good news is that it’s the hardest part of the trail; at least in my opinion. Once you are thru that portion the rest of the trail seems similar to the hike in. Again, be mindful of crawlers ledge if it’s windy and make sure to fill up with water at Hanakoa. When you hit Hanakapi’ai it will probably be the middle of the afternoon and it will be busy.
You will end up navigating several people on the last two miles but most folks are great and a few will ask you about your trip. When you get back to the trailhead at Ke’e Beach you will find showers and bathrooms in the park area. There is also a nice table to put your stuff on while you clean up. There is a pay phone there if you need to call for a ride but remember to either take coins ($1.50) or have a credit card as that’s the only way you can make a call. It’s also fairly easy to hitch back into Hanalei if you need to do that but I would recommend showering before you do that as to not stink out your hosts.
[blockquote style=”3″]The climb back out thru Mars and Red Hill are, without a doubt, my least favorite part of the entire trip. It’s steep, slick and long.[/blockquote]
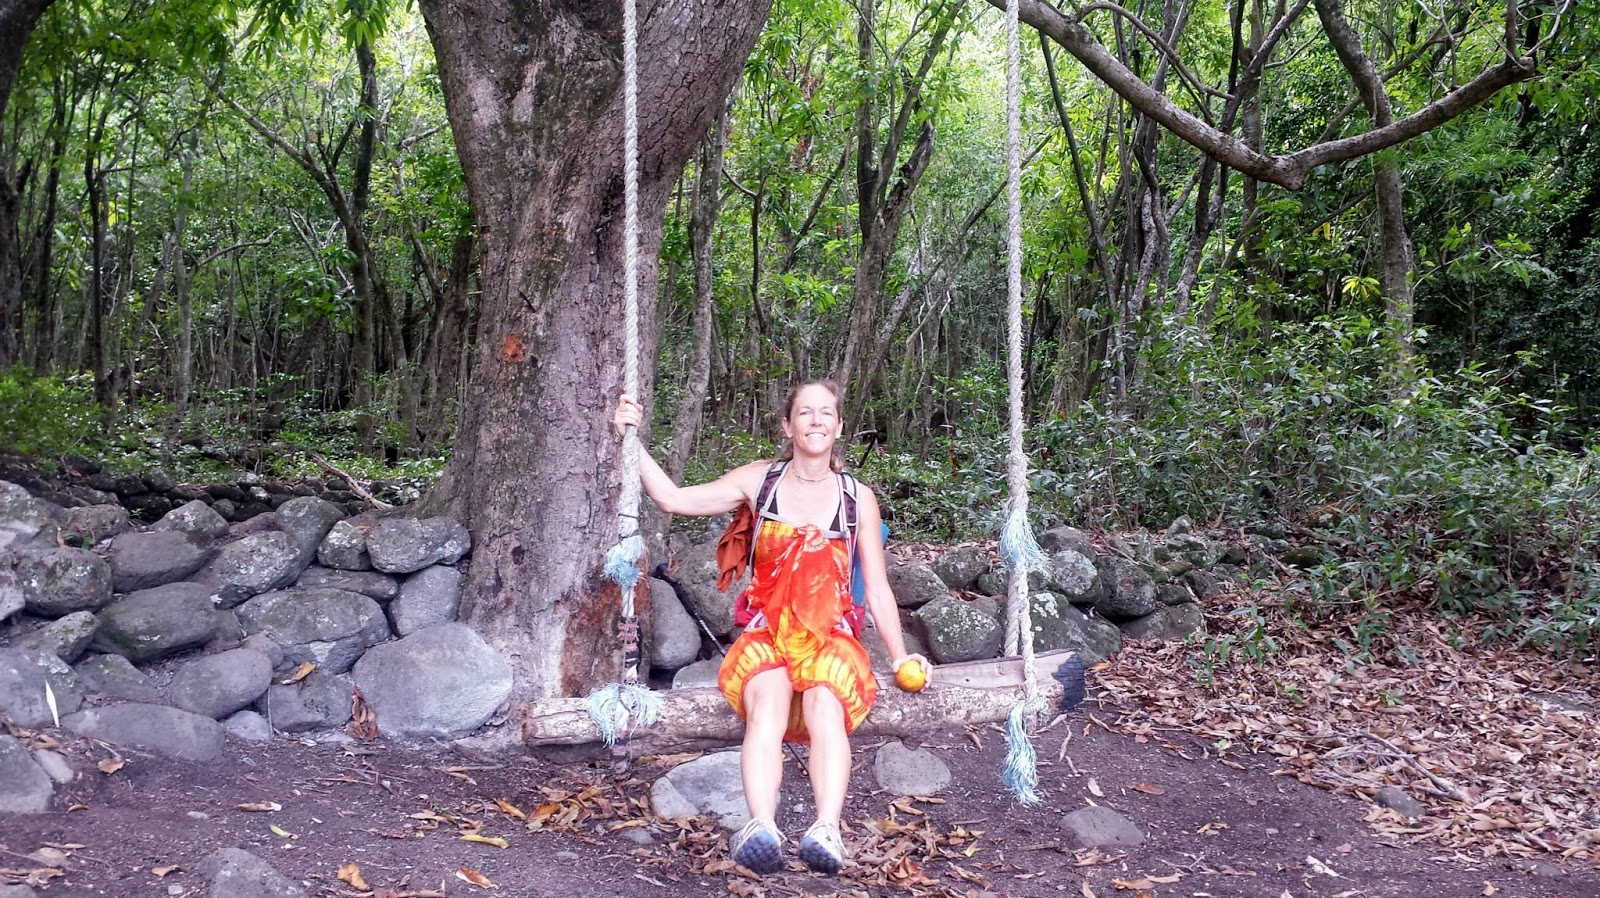
Rope swing near the old community kitchen
Here’s some media from a previous trip:
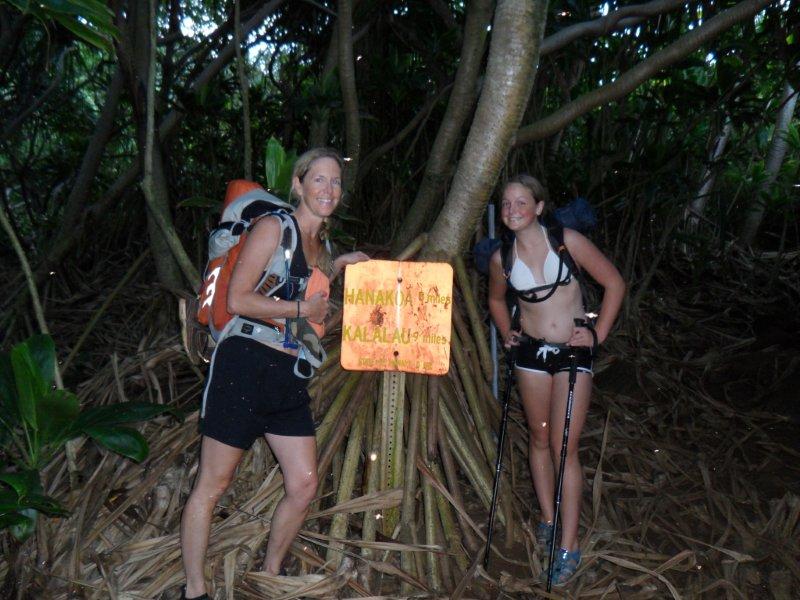
Starting the Trail
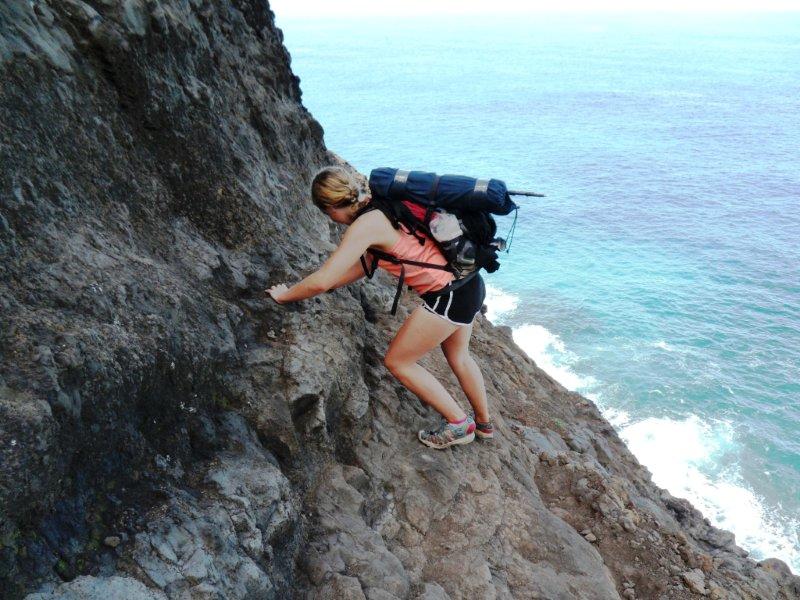
Mile 7
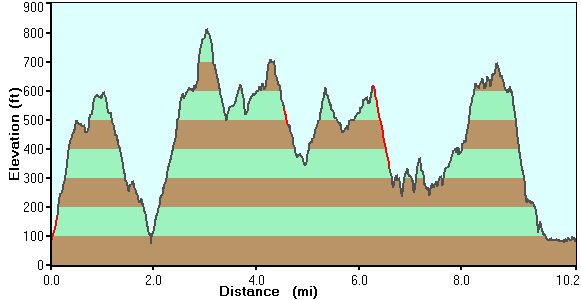
Elevation Change
Read more about Larry & Mitzi’s previous trips to Kalalau at this link.